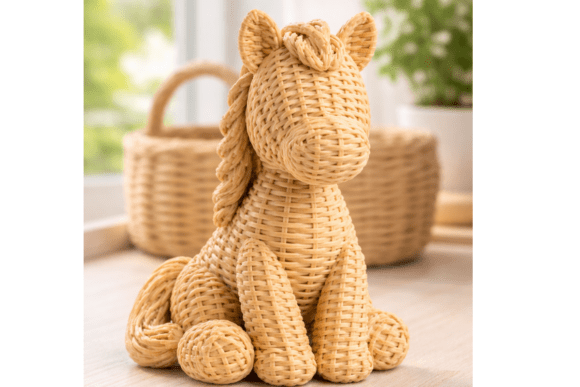
Wicker Horse STL 3D Model for Easy 3D Printing
In the landscape of modern digital fabrication, the gap between a static design file and a tangible object has never been smaller. For creators, hobbyists, and interior designers alike, the ability to transform a digital asset into a physical reality is not just a novelty; it is a functional workflow tool. One such asset that has gained traction in the community is the Wicker Horse STL 3D Model for Easy 3D Printing. This model represents more than just a decorative item; it serves as an excellent case study in how complex geometries can be approached with simple, accessible technology. Whether you are looking to add a unique piece to your home decor or seeking a thoughtful, personalized gift, this model offers a blend of aesthetic charm and technical accessibility.
The core appeal of this specific STL file lies in its balance of intricacy and printability. The "wicker" aesthetic requires precise handling of negative space and thin walls, features that challenge less experienced printers but remain well within the capabilities of standard FDM (Fused Deposition Modeling) machines. By understanding how to integrate this model into your printing routine, you can elevate your output from basic prototypes to polished, gallery-worthy pieces. This article explores the practical aspects of using the Wicker Horse STL, focusing on preparation, material selection, customization strategies, and final assembly to ensure a successful outcome.
Understanding the Model and Its Workflow Integration
Before initiating the print job, it is crucial to understand what makes the Wicker Horse STL distinct. Unlike solid models that rely on mass for structural integrity, wicker-style designs depend on the interplay of lines and voids. This means that support structures and slicer settings must be optimized differently than they would be for a solid statue. The model fits seamlessly into various creative workflows, whether you are a professional designer testing new rendering techniques or a hobbyist looking to complete a weekend project.
For professionals, this model can serve as a portfolio piece demonstrating proficiency in slicing complex geometries. It showcases an ability to manage overhangs and bridge gaps effectively. For educators, it provides a tangible lesson in topology and structural engineering, illustrating how lightness does not necessarily equate to fragility if designed correctly. In a personal context, the model bridges the gap between digital consumption and physical ownership, allowing users to participate actively in the creation process rather than merely purchasing a mass-produced item.
Material Selection and Printer Compatibility
One of the most significant advantages of the Wicker Horse STL is its compatibility with a wide range of materials. While the default color of the model will depend on the filament you choose, the structural requirements are modest enough to accommodate everything from PLA to ABS, provided your printer supports these materials. The choice of material should be driven by the intended use case and environmental factors.
- PLA (Polylactic Acid): This is the most common choice for beginners and intermediate users. PLA is easy to print, has low warping tendencies, and comes in a vast array of colors. For a desktop showpiece or indoor decor, PLA is ideal due to its rigidity and ease of handling. However, it has a lower heat resistance, so it should not be placed in direct sunlight or hot environments.
- ABS (Acrylonitrile Butadiene Styrene): If durability and heat resistance are priorities, ABS is a superior option. It is often used for items that need to withstand higher temperatures or rougher handling. However, printing ABS requires an enclosed chamber to prevent warping and cracking, making it less suitable for open-frame printers.
- PETG: A middle ground between PLA and ABS, PETG offers strength and flexibility with easier printing characteristics than ABS. It is an excellent choice if you want a durable print without the stringent environmental controls required for ABS.
When selecting your material, consider the visual impact. The wicker pattern relies on contrast and shadow to define its shape. Matte finishes tend to enhance the texture, while glossy filaments might highlight surface imperfections or layer lines. Experimenting with different materials allows you to tailor the final product to your specific aesthetic goals.
Customization and Color Strategies
The versatility of 3D printing allows for extensive customization, and the Wicker Horse STL is no exception. While the default monochromatic look is elegant, there are several ways to introduce color and personality into the design. However, customization requires strategic planning to avoid obscuring the intricate details that make the model appealing.
Single-Color Enhancements: You can achieve a premium look by using specialized filaments. Printing the horse in a gold-colored PLA or metallic finish can transform it from a simple figurine into a trophy-like object. Similarly, using bright, vibrant colors can turn the model into a playful toy for children, adding a splash of fun to a playroom or classroom setting.
Multi-Color and Gradient Effects: For those with advanced setups, such as printers equipped with dual extruders or mixing nozzles, creating gradient effects is possible. A smooth transition from one hue to another can mimic the natural variations found in real wicker baskets or artistic sculptures. This approach adds depth and dimension, drawing the eye across the complex geometry of the horse.
Post-Processing: If your printer does not support multi-color printing, you can still introduce color through painting or airbrushing after the print is complete. This method allows for precise control over shading and highlights. However, caution is advised: over-colorization can fill in the fine details of the wicker weave, flattening the visual interest. It is recommended to use colors strategically, perhaps highlighting specific areas like the mane or tail, while leaving the body in its natural printed state to preserve the textural complexity.
Slicer Settings and Print Preparation
Successful printing of the Wicker Horse STL begins in the slicer software. Proper configuration is essential to ensure that the thin walls and overhangs are rendered accurately. Here are key considerations for optimizing your print settings:
- Infill Density: Since the model is largely hollow and relies on its outer shell for structure, high infill is unnecessary. A density of 10–15% is usually sufficient to provide internal support without wasting material or increasing print time significantly.
- Wall Thickness: Increasing the number of perimeters (walls) can improve the strength and appearance of the print. Aim for at least two to three wall thicknesses to ensure that the wicker strands hold their shape and do not become brittle.
- Support Structures: Depending on the orientation of the model in the slicer, you may need minimal support structures. Use tree supports or organic supports where necessary, as these are easier to remove and leave fewer marks on the delicate wicker details. Positioning the horse horizontally can sometimes reduce the need for supports altogether.
- Print Speed: Slower print speeds, particularly for the first few layers and any bridging sections, can improve quality. Reducing speed allows the extruder to deposit material more precisely, reducing stringing and ensuring clean lines in the intricate weave pattern.
Scaling and Final Assembly
The size of the Wicker Horse STL is entirely adjustable, offering flexibility for different display contexts. Whether you desire a small desktop accent or a large living room statement piece, resizing the model in your slicer is straightforward. When scaling up, ensure that your printer’s build volume can accommodate the larger dimensions. Conversely, when scaling down, pay close attention to the minimum feature size; extremely small prints may lose detail if the nozzle diameter is too large relative to the model size.
If the model is printed in parts, which is common for larger statues to save on material or time, careful alignment during assembly is crucial. Using strong adhesives compatible with your chosen material, such as cyanoacrylate for PLA or solvent welding for ABS, will ensure a seamless joint. Sanding and filling minor gaps before painting can further enhance the professional finish.
Long-Term Value and Maintenance
Once printed, the Wicker Horse becomes a permanent fixture in your collection or workspace. Its value extends beyond aesthetics; it represents a completed project and a mastered skill. Regular maintenance involves dusting with a soft brush or compressed air to keep the intricate details free from debris. Avoid harsh chemicals that could degrade the plastic, especially if using PLA, which is sensitive to certain solvents.
By integrating the Wicker Horse STL into your workflow, you engage in a process that blends creativity with technical precision. It is a reminder that 3D printing is not just about rapid prototyping but also about crafting unique, meaningful objects. With careful planning, appropriate material selection, and thoughtful customization, this model can yield amazing results that satisfy both the maker and the observer.