Transforming Simple Cardstock into a Stunning Holiday Centerpiece: A Guide to the Clock 3D Papercraft Design
When it comes to holiday decorating, there is often a delicate balance between festive flair and sophisticated elegance. You want your home or event space to feel warm and inviting, but you also want it to look curated rather than cluttered. This is where Clock 3D Papercraft steps in as an unexpected yet brilliant solution. Far more than just a simple craft project for children, this specific design offers a unique geometric aesthetic that serves as a stunning centerpiece for all your holiday decor, parties, or events.
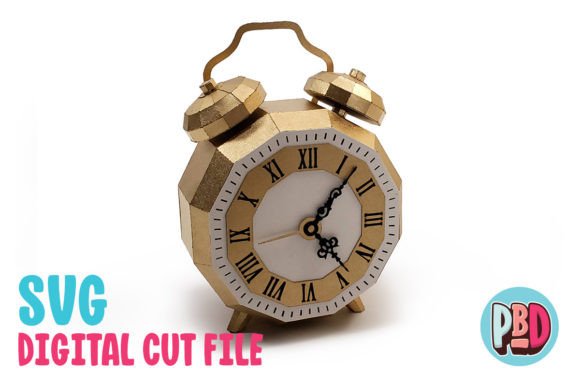
The beauty of this particular model lies in its versatility. Measuring 5.5 W x 3 D x 7 H, it is substantial enough to command attention on a dining table, mantelpiece, or entryway console, yet compact enough not to overwhelm smaller spaces. Whether you are hosting a cozy family gathering or a sleek corporate holiday party, this paper clock adds a touch of modern artistry that bridges the gap between traditional seasonal themes and contemporary design.
Why Choose a 3D Papercraft Centerpiece?
In recent years, DIY (Do-It-Yourself) and DIFM (Do-It-For-Me) crafts have evolved from niche hobbies into mainstream lifestyle activities. People are increasingly looking for ways to personalize their environments without breaking the bank or relying solely on mass-produced items. A 3D papercraft design like the Clock offers several distinct advantages over store-bought decorations.
First, there is the element of personalization. When you build the Clock 3D Papercraft, you control every aspect of its final appearance. While the instructions include helpful texturing and painting tips, the canvas is yours. You can opt for a classic monochrome look using crisp white cardstock with gold foil accents for a luxurious winter vibe. Alternatively, you might choose deep emerald greens and reds for a traditional Christmas aesthetic, or even stick to minimalist black and silver for a modern New Year’s Eve party theme.
Secondly, papercraft is incredibly lightweight and safe. Unlike glass ornaments or heavy ceramic figurines, paper models pose no risk of shattering if knocked over by pets or curious children. They are easy to store, stack flat when disassembled, and can be reused year after year if cared for properly. This makes them an eco-friendly alternative to single-use plastic decorations, appealing to those who prioritize sustainability in their holiday traditions.
Material Matters: The Importance of Medium Cardstock
To achieve the structural integrity required for this design, the choice of material is paramount. The instructions explicitly note that this design is intended to be built using medium cardstock. This is not merely a suggestion; it is a functional requirement for the clock to hold its three-dimensional shape.
Lighter paper, such as standard printer paper, will result in a flimsy structure that lacks definition and may collapse under its own weight. On the other hand, heavy chipboard or cardboard might be too difficult to cut cleanly with consumer-grade cutting machines, leading to jagged edges that ruin the clean lines of the design. Medium cardstock, typically ranging from 65lb to 80lb index weight, provides the perfect sweet spot. It is rigid enough to stand upright and maintain its form, yet flexible enough to fold along scored lines without cracking.
Practical Tip: Before purchasing your materials, consider the finish. Matte cardstock provides a modern, gallery-like appearance and hides fingerprints well. Glossy cardstock reflects light beautifully, which can enhance the visual impact of the piece under party lighting. Textured cardstock, such as linen or cotton paper, adds depth and sophistication, making the finished clock look like a high-end decorative object rather than a craft project.
Navigating Digital Files: SVG vs. DXF
One of the most critical aspects of using digital papercraft designs is understanding the file formats included in your download. The package for this Clock design includes both SVG and DXF files within a single ZIP archive. Understanding the difference between these two formats is crucial for a smooth crafting experience.
SVG (Scalable Vector Graphics): This is the preferred format for most modern users. SVG files are vector-based, meaning they can be scaled to any size without losing quality. They are compatible with advanced software platforms like Silhouette Designer Edition and above, as well as Cricut Design Space. If you have access to these tools, the SVG file is your best bet. It ensures clean cuts, precise registration, and easier manipulation of individual pieces.
DXF (Drawing Exchange Format): This older format is primarily used with Silhouette Basic Edition. However, users should be aware that DXF files open slowly in Silhouette Studio and are not as clean as SVG files. They may contain unnecessary nodes or layers that need manual cleanup before cutting. Furthermore, improper settings can lead to misalignment during the cutting process.
Essential Setup for DXF Users
If you are using Silhouette Basic Edition and must rely on the DXF file, proper configuration is non-negotiable. Incorrect preferences can result in wasted materials and frustrated attempts at assembly. Follow these steps carefully to ensure your file loads correctly:
- Edit Preferences: Open your software and navigate to the preferences menu.
- Import DXF: Select the option to import your DXF file.
- Open Change Settings: Look for the alignment or import behavior options.
- Change from “As-is” to “Centered”: This is the most vital step. Setting the import behavior to "Centered" ensures that the design aligns correctly with your cutting mat’s origin point. Without this adjustment, your machine may attempt to cut outside the printable area or produce skewed results.
Even with correct settings, remember that DXF files are inherently less efficient than SVGs. If possible, always upgrade to a platform that supports SVG to save time and reduce errors. The clarity of the SVG cut file will make the intricate details of the clock’s gears and casing much easier to execute.
Assembly and Finishing Techniques
Once your pieces are cut, the assembly process begins. The instructions provided in the PDF download are designed to guide you through each stage, but a few general practices can elevate the final product.
Scoring is Key: Never skip the scoring step. Using a bone folder or a dull blade, gently score along all fold lines before attempting to bend the paper. This creates a sharp, crisp crease that gives the 3D structure its professional look. Rough folds look amateurish; sharp folds look architectural.
Adhesive Selection: For medium cardstock, a strong liquid glue or double-sided tape works best. Glue sticks may not provide enough hold for heavier layers, while excessive liquid glue can warp the paper. Apply adhesive sparingly to tabs, ensuring you do not get glue on visible surfaces. If you make a mistake, use a toothpick to remove excess glue immediately.
Texturing and Painting: As mentioned in the instructions, this design allows for creative texturing. You can apply watercolor washes before assembly for a soft, blended look, or use acrylic paints for bold, opaque colors. Consider adding metallic leafing to the edges of the clock hands or the rim for a touch of glamour. If you want a rustic look, try distressing the edges with sandpaper or ink pads to simulate aged wood or metal.
Styling Your Clock 3D Papercraft
Now that you have built your masterpiece, how do you integrate it into your space? Because the Clock 3D Papercraft measures 5.5 W x 3 D x 7 H, it has a vertical orientation that draws the eye upward. Here are a few styling ideas:
- The Mantel Display: Place the clock centrally on your fireplace mantel. Flank it with small potted evergreen branches or pillar candles in varying heights. The neutral base of the paper clock allows the surrounding greenery and lights to pop.
- Dining Table Accent: Use multiple clocks in different sizes (if available) or pair one clock with a runner and scattered pinecones. It serves as a conversation starter for guests seated around the table.
- Gift Tag Alternative: For a unique twist, create smaller versions of the clock design to use as oversized gift tags. Attach them to presents with ribbon, turning the decoration itself into part of the gift presentation.
In conclusion, the Clock 3D Papercraft is more than just a pastime; it is a tool for creative expression and home beautification. By selecting the right materials, mastering the digital file formats, and applying thoughtful finishing techniques, you can create a centerpiece that reflects your personal style and enhances the festive atmosphere of any occasion. Whether you are a seasoned papercrafter or a beginner willing to learn, this project offers a rewarding challenge and a beautiful reward.